This article outlines instructions to configure a client VPN connection on commonly used operating systems. For more information about client VPN, please refer to our Client VPN Overvi documentation.
For troubleshooting, please refer to our Troubleshooting Client VPN documentation.
Android
Note: Support for L2TP/IPsec VPNs was deprecated on Android devices as of Android 12. Existing configurations on devices will still work, but there is no current way to set up a Client VPN connection on new devices without a pre-existing one.
To configure an Android device to connect to the client VPN, follow these steps:
- Navigate to Settings > Wireless & Networks > VPN
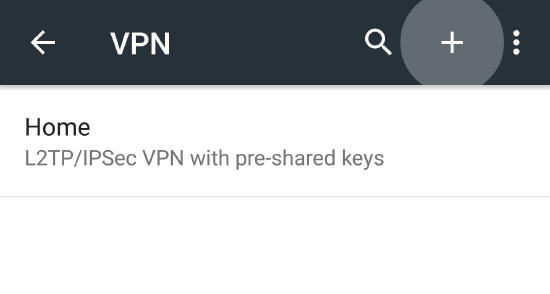
- Click the plus icon to add an additional VPN profile
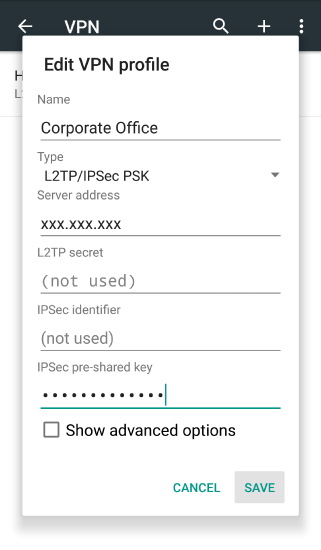
Name: This can be anything you want to name the connection, for example, "Work VPN"
Type: select L2TP/IPSEC PSK
Server address: Enter the hostname (e.g. .com) or the active WAN IP (e.g. XXX.XXX.XXX). Hostname is encouraged instead of active WAN IP because it is more reliable in cases of WAN failover. Admin can find them in the dashboard under Security appliance > Monitor > Appliance status.
IPSec preshared key: Enter the preshared key that admin created in Security appliance > Configure > Client VPN settings.
Click save
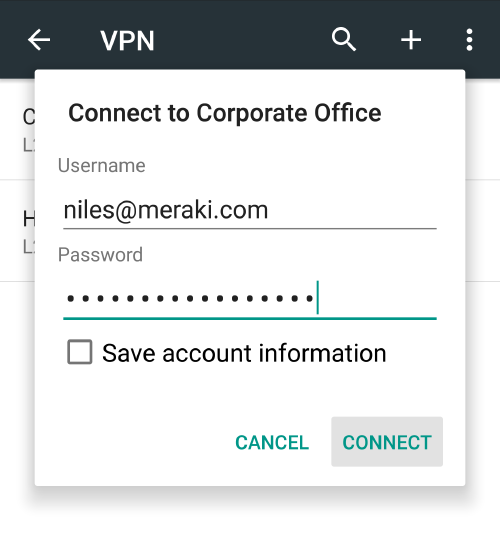
You will be prompted for user credentials when you connect.
The instructions below are tested on Mac OS 10.7.3 (Lion).
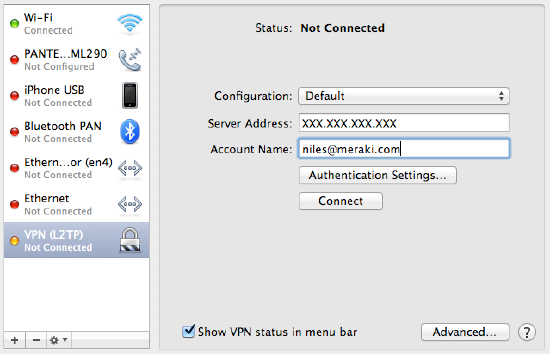
Open System Preferences > Network from the Mac applications menu. Click the "+" button to create a new service, select VPN as the interface type, and choose L2TP over IPsec from the pull-down menu.
- Server Address: Enter the hostname (e.g. .com) or the active WAN IP (e.g. XXX.XXX.XXX). Hostname is encouraged instead of active WAN IP because it is more reliable in cases of WAN failover. Admin can find them in the dashboard under Security appliance > Monitor > Appliance status.
- Account Name: Enter the account name of the user (based on AD, RADIUS, or Meraki cloud authentication).
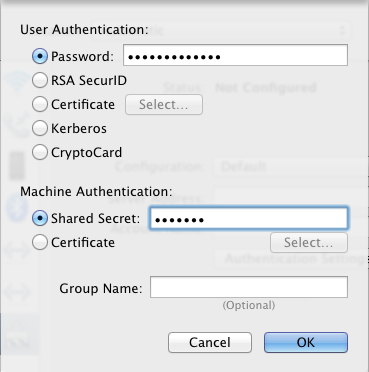
Click Authentication Settings and provide the following information:
- User Authentication > Password: User password (based on AD, RADIUS or Meraki cloud authentication).
- Machine Authentication > Shared Secret: Enter the shared secret that admin created in Security appliance > Configure > Client VPN settings.
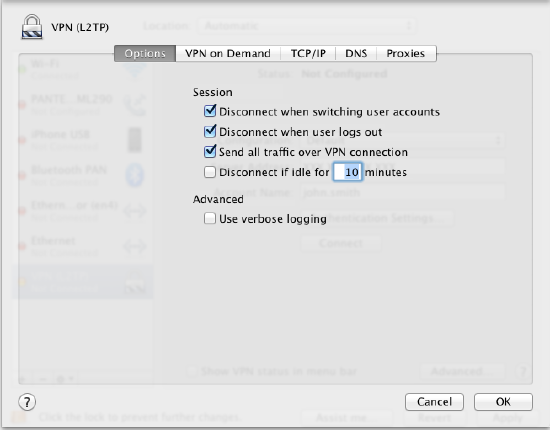
Click OK to go back to the main VPN settings page, then click Advanced and enable the Send all traffic over VPN connection option.
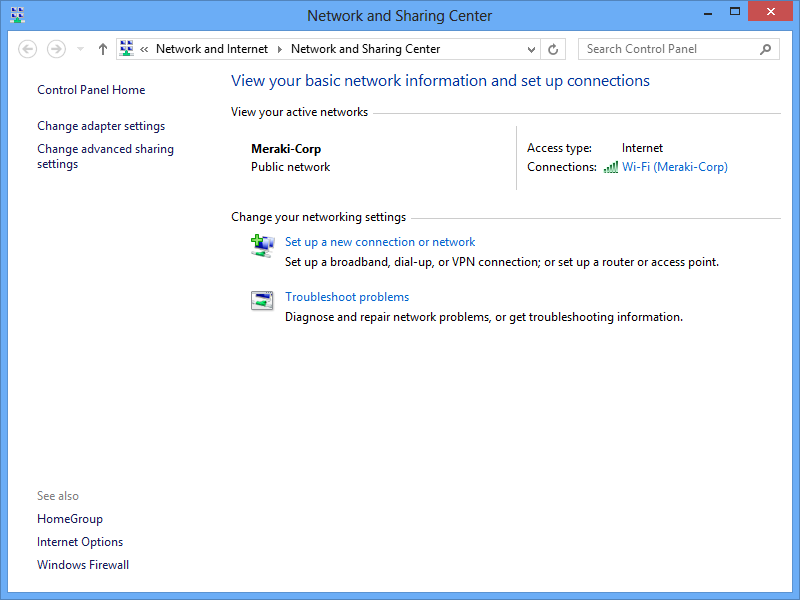
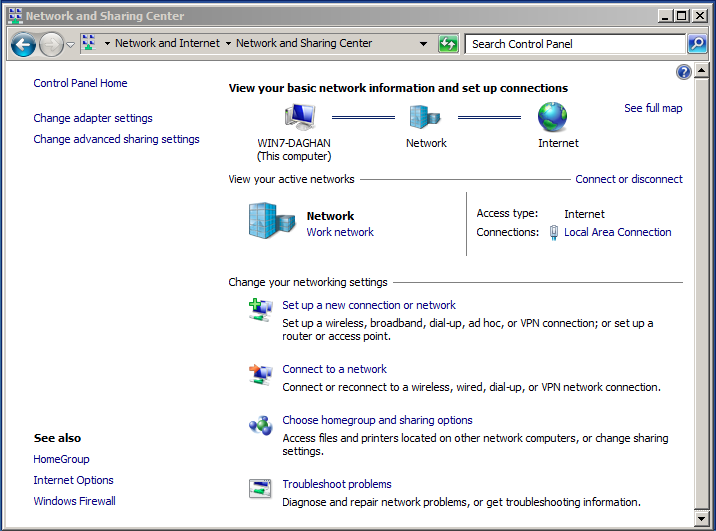
Open Start Menu > Control Panel, click on Network and Internet, click on View network status and tasks.
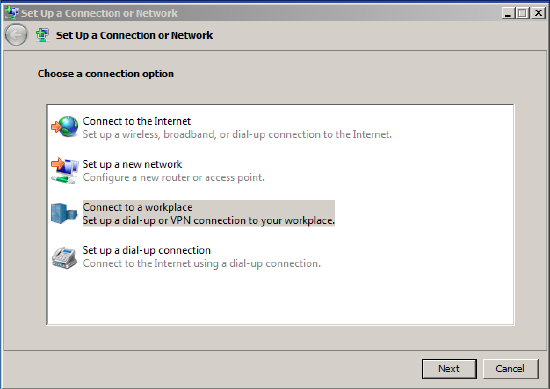
In the Set up a connection or network pop-up window, choose Connect to a workplace (set up a dial-up or VPN connection to your workplace).
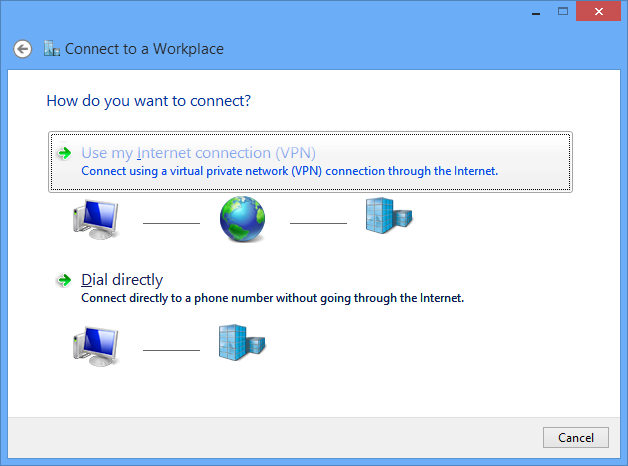
Choose Use my Internet connection (VPN) in the Connect to a workspace dialog window.

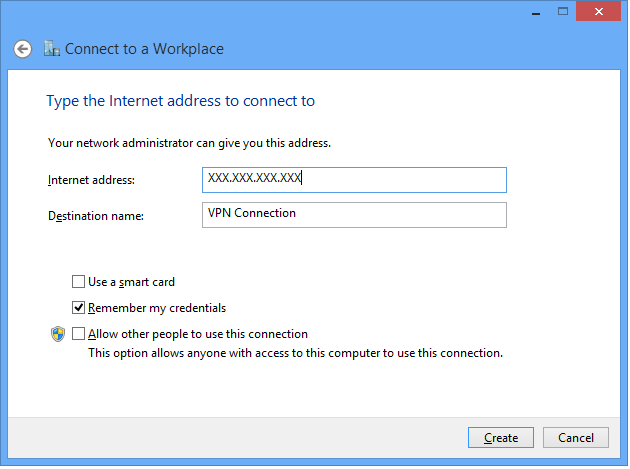
In the Connect to a Workplace dialog box, enter:
- Internet address: Enter the hostname (e.g. .com) or the active WAN IP (e.g. XXX.XXX.XXX). Hostname is encouraged instead of active WAN IP because it is more reliable in cases of WAN failover. Admin can find them in the dashboard under Security appliance > Monitor > Appliance status.
- Destination name: This can be anything you want to name this connection, for example, "Work VPN".
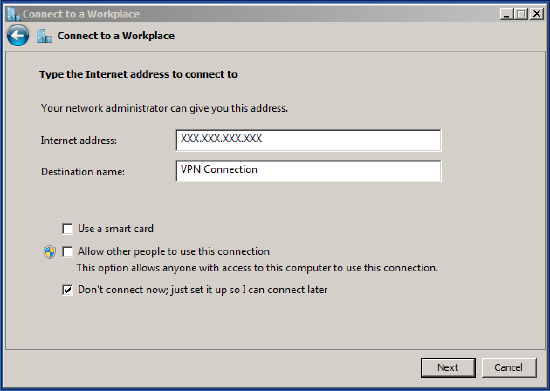
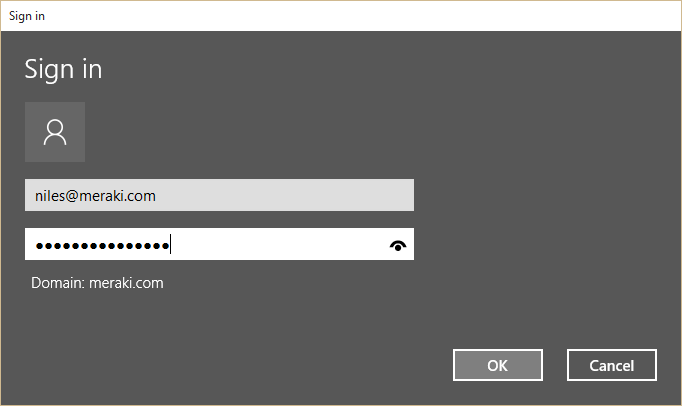
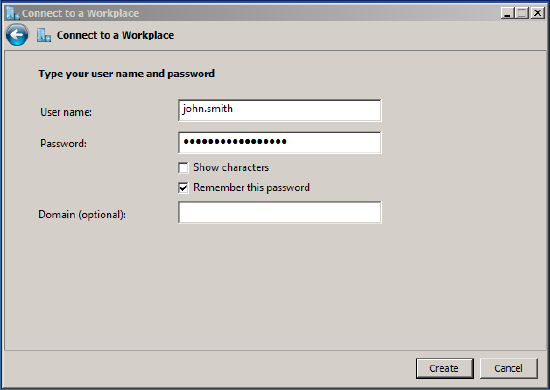
Click Next. In the next dialog window, enter the user credentials, and click Create.
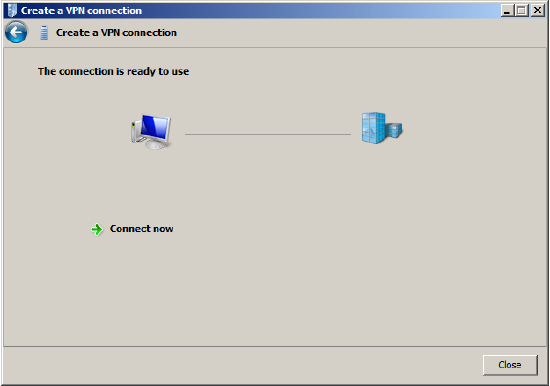
Close the VPN connection wizard.
Go to
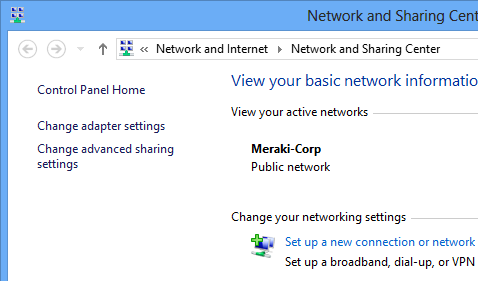
Networking and Sharing Center and click
Change Adapter Settings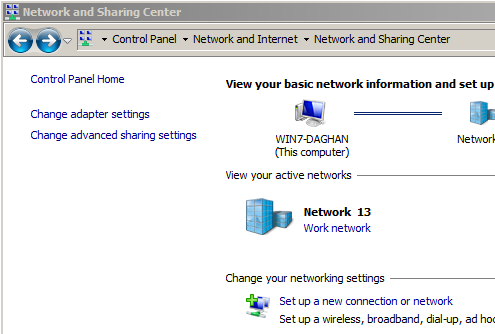
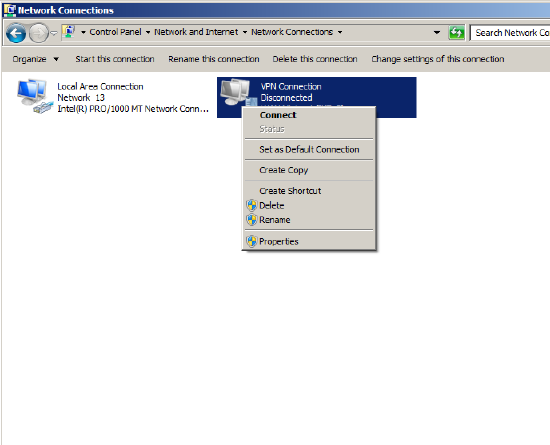
In the Network Connections window, right-click on the new VPN connection settings and choose Properties.
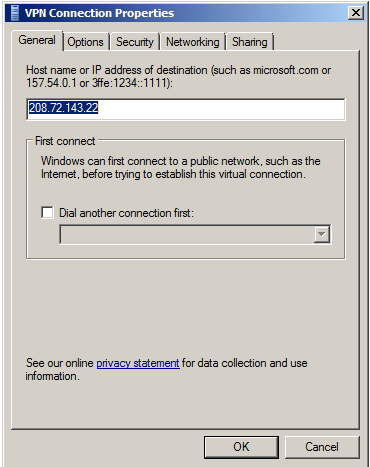
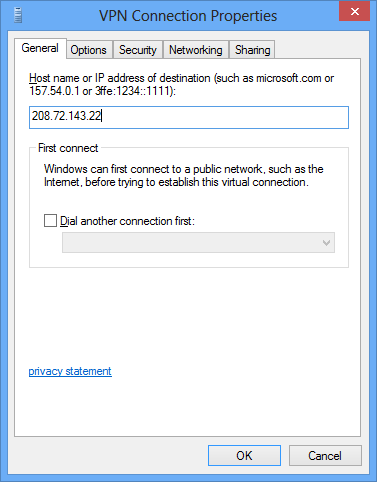
In the General tab, verify the hostname (e.g. .com) or the active WAN IP (e.g. XXX.XXX.XXX). Hostname is encouraged instead of active WAN IP because it is more reliable in cases of WAN failover. Admin can find them in the dashboard under Security appliance > Monitor > Appliance status.
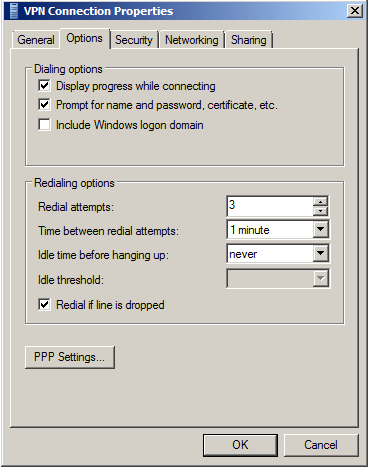
In the Options tab, uncheck Include Windows logon domain.
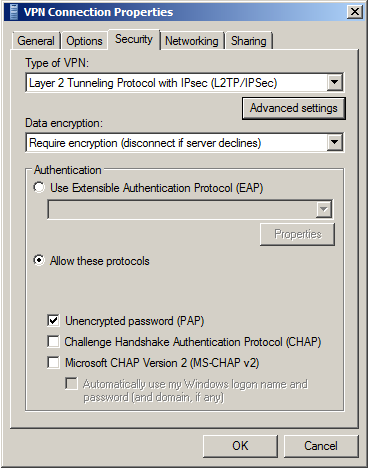
In the Security tab, choose Layer 2 Tunneling Protocol with IPsec (L2TP/IPSec).
Check Unencrypted password (PAP), and uncheck all other options.
Click on Advanced settings.
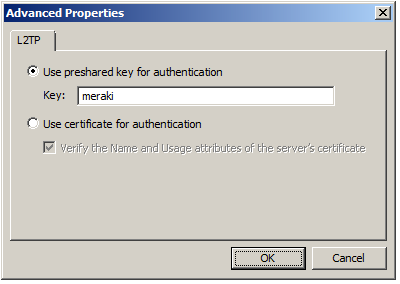
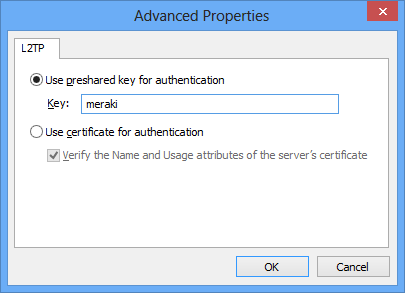
In the Advanced Properties dialog box, choose Use preshared key for authentication and enter the preshared key that admin created in Security appliance > Configure > Client VPN settings.
Click OK.
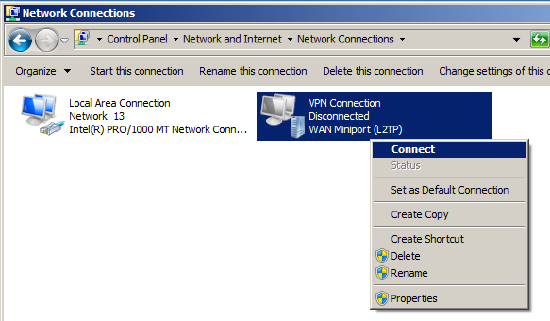
At the Network Connections window, right-click on the VPN connection and click Connect.
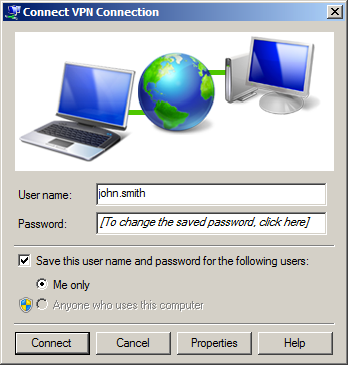
Verify your username and click Connect.
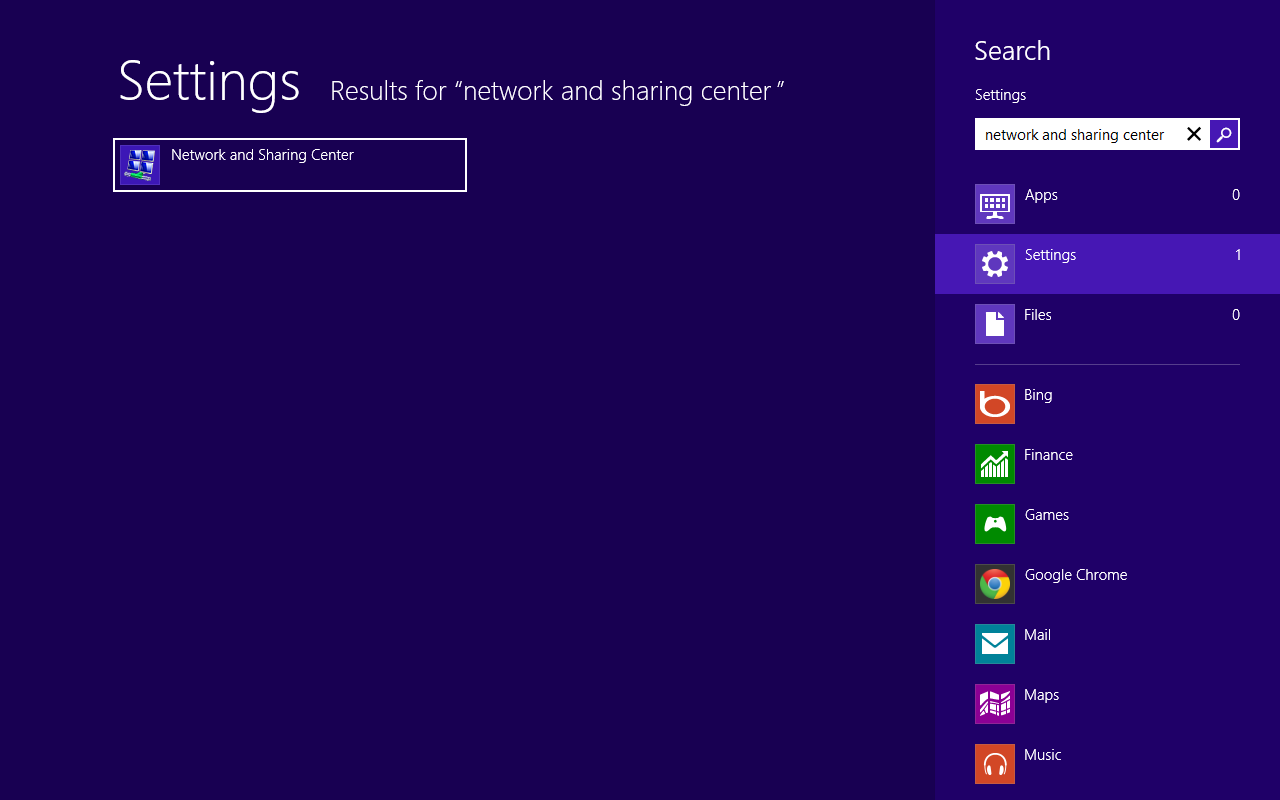
Open Start Menu > Network and Sharing Center and click Settings.
In the Network and Sharing Center, click Set up a new connection or network.
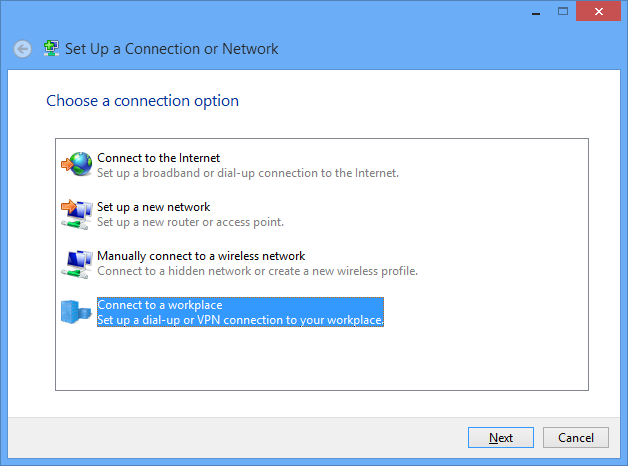
In the Set Up a Connection or Network pop-up window, choose Connect to a workplace.
(Set up a dial-up or VPN connection to your workplace)
Choose Use my Internet connection (VPN), in the Connect to a Workspace dialog window.
In the Connect to a Workplace dialog box, enter:
- Internet address: Enter the hostname (e.g. .com) or the active WAN IP (e.g. XXX.XXX.XXX). Hostname is encouraged instead of active WAN IP because it is more reliable in cases of WAN failover. Admin can find them in the dashboard under Security appliance > Monitor > Appliance status.
- Destination name: This can be anything you want to name this connection, for example, "Work VPN".
Click Create.
Go back to Network and Sharing Center and click Change Adapter Settings.
In the Network Connections window, right-click on the VPN connection icon and choose Properties.
In the General tab, verify the hostname (e.g. .com) or the active WAN IP (e.g. XXX.XXX.XXX). Hostname is encouraged instead of active WAN IP because it is more reliable in cases of WAN failover. Admin can find them in the dashboard under Security appliance > Monitor > Appliance status.
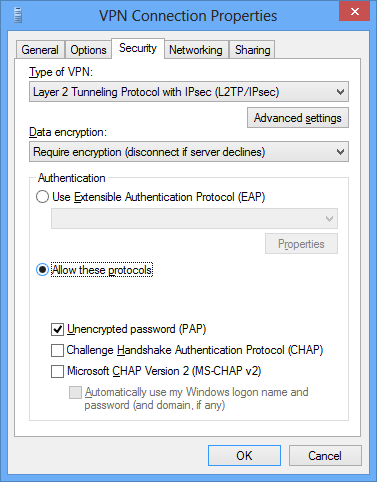
In the Security tab, choose Layer 2 Tunneling Protocol with IPsec (L2TP/IPSec).
Check Unencrypted password (PAP) and uncheck all other options.
Click on Advanced settings.
In the Advanced Properties dialog box, choose Use preshared key for authentication and enter the preshared key that admin created in Security appliance > Configure > Client VPN settings.
Click OK.
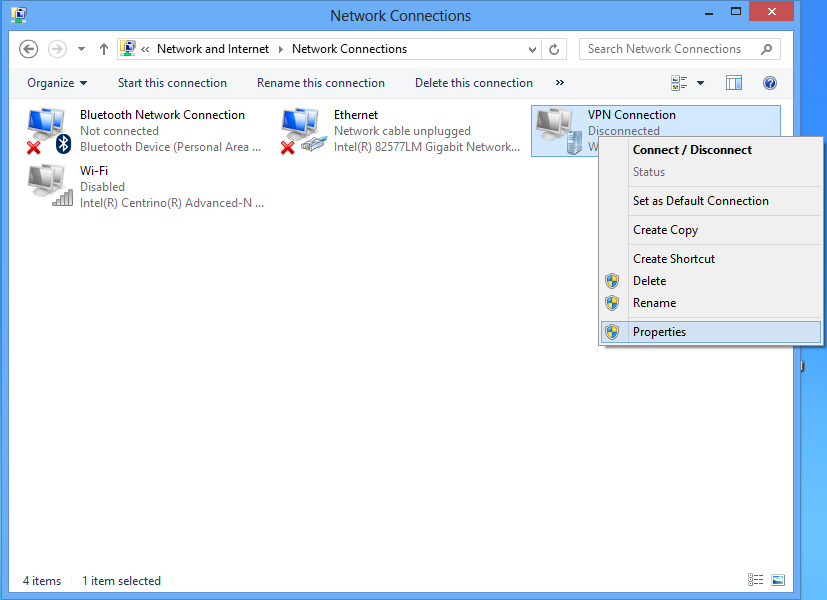
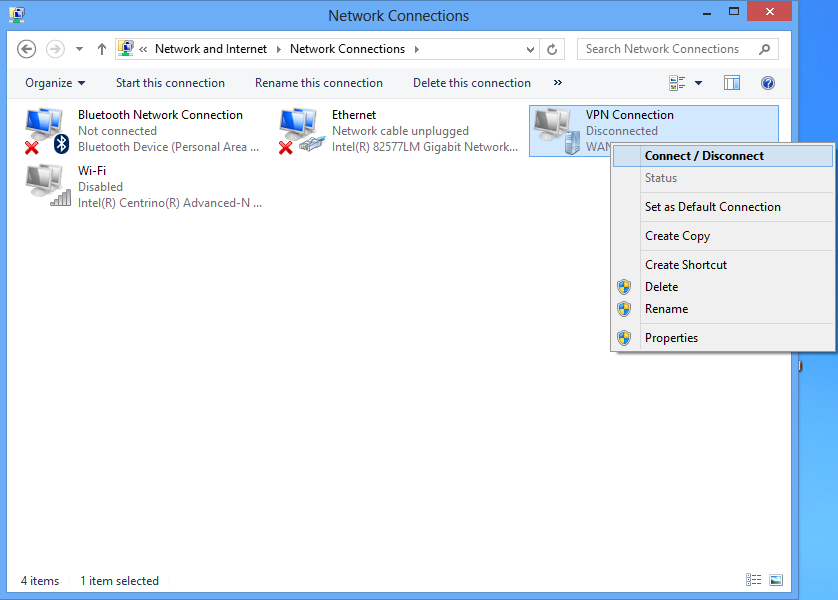
Back at the Network Connections window, right-click on the VPN connection and click Connect / Disconnect.
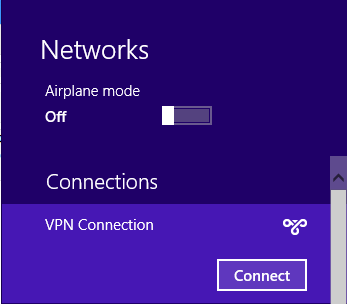
Find your VPN profile and click Connect.
Enter your username and password.
Click OK.

Windows 10
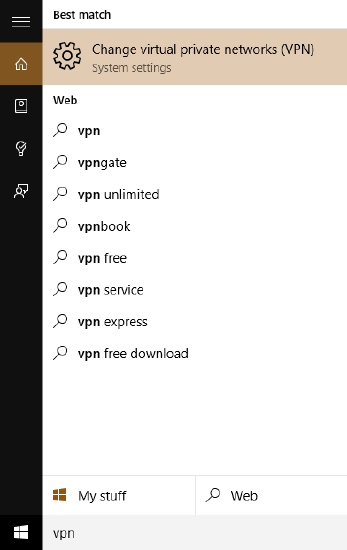
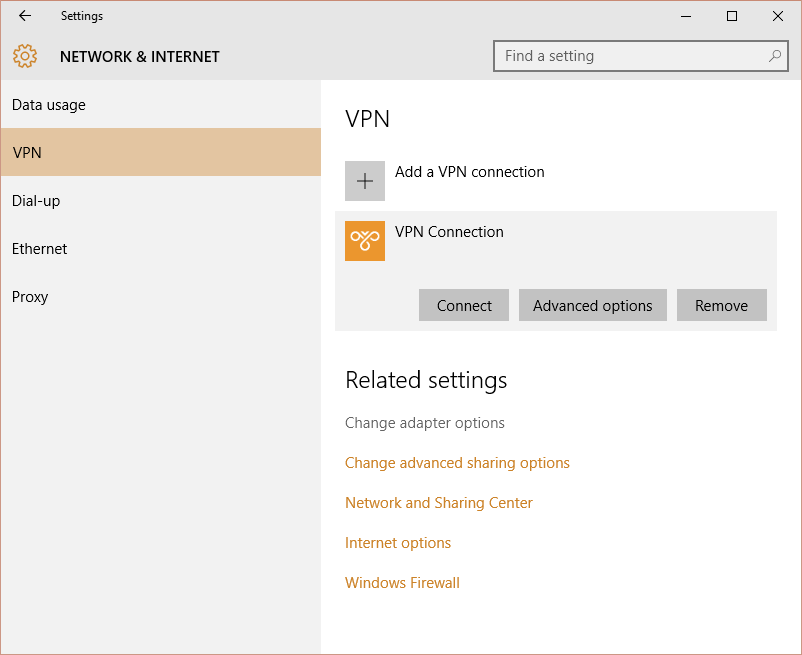
Open Start Menu > Search "VPN" > Click Change virtual private networks (VPN)
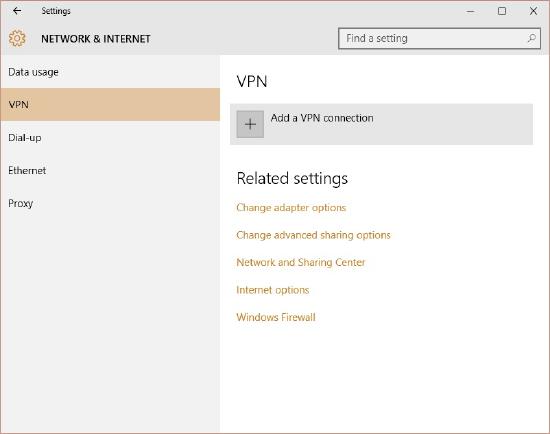
From the VPN settings page, click Add a VPN connection.
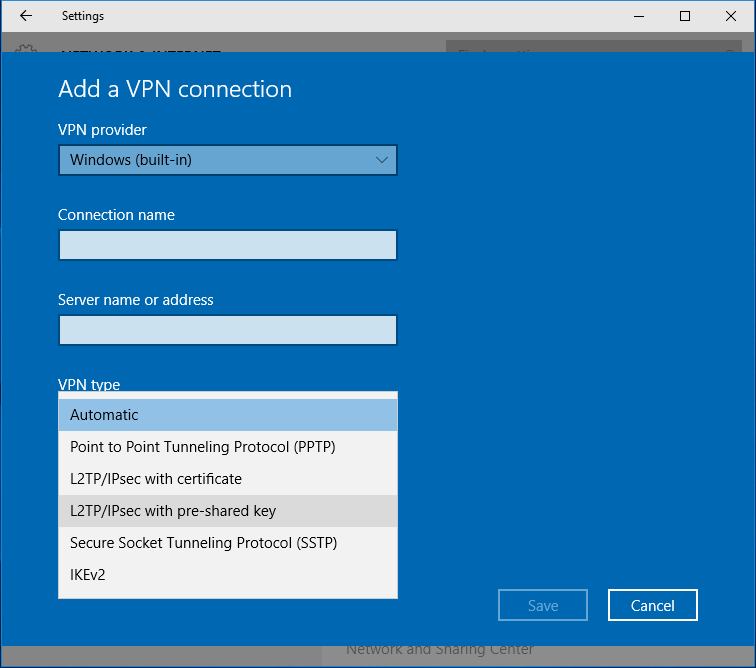
In the Add a VPN connection dialog:
- VPN provider: Set to Windows (built-in)
- Connection name: This can be anything you want to name this connection, for example, "Work VPN"
- Server name or address: Enter the hostname (e.g. .com) or the active WAN IP (e.g. XXX.XXX.XXX). Hostname is encouraged instead of active WAN IP because it is more reliable in cases of WAN failover; admin can find them in the dashboard under Security appliance > Monitor > Appliance status
- VPN type: Select L2TP/IPsec with preshared key
- User name and Password: optional
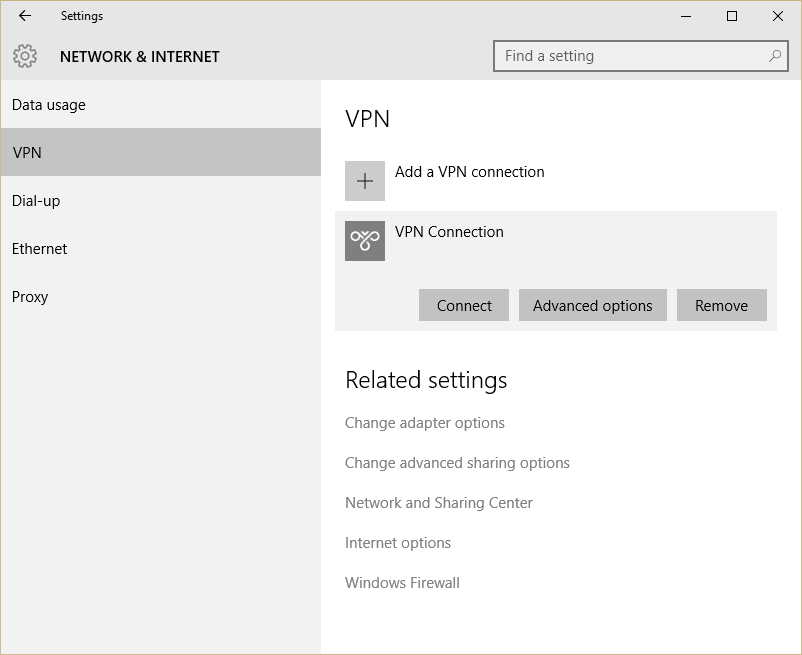
Press Save.
After the VPN connection has been created, click Change adapter options under Related settings.
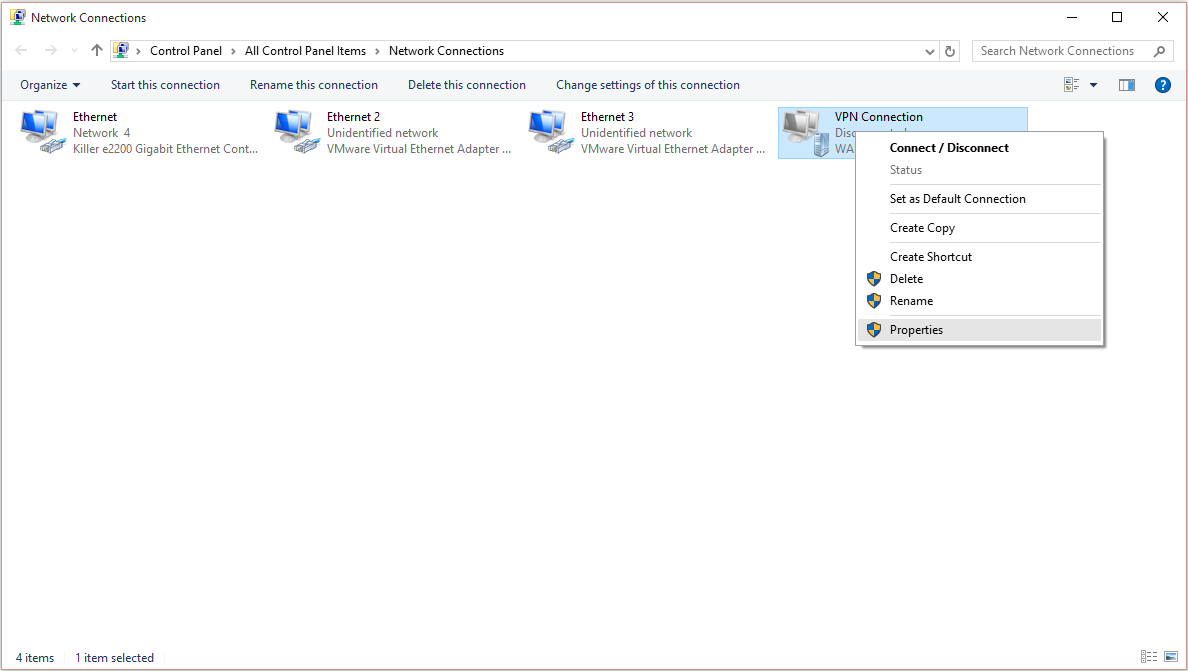
Right-click on VPN Connection from the list of adapters and click Properties.
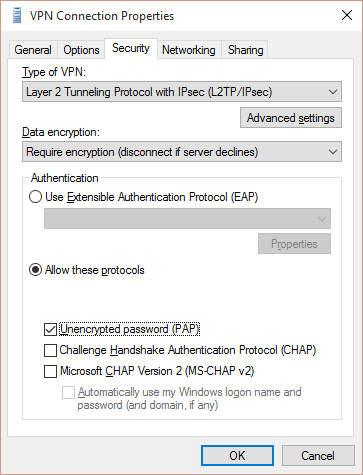
In the Security tab, select Require encryption (disconnect if sever declines) under Data encryption.
Then, select Allow these protocols under Authentication. From the list of protocols, check Unencrypted password (PAP), and uncheck all other options.
Click on Advanced settings.
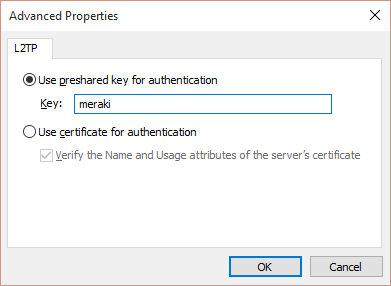
In the Advanced Properties dialog box, choose "Use preshared key for authentication" and enter the preshared key that admin created in Security appliance > Configure > Client VPN settings.
Back at the Network Connections window, right-click on the VPN connection and click Connect / Disconnect.
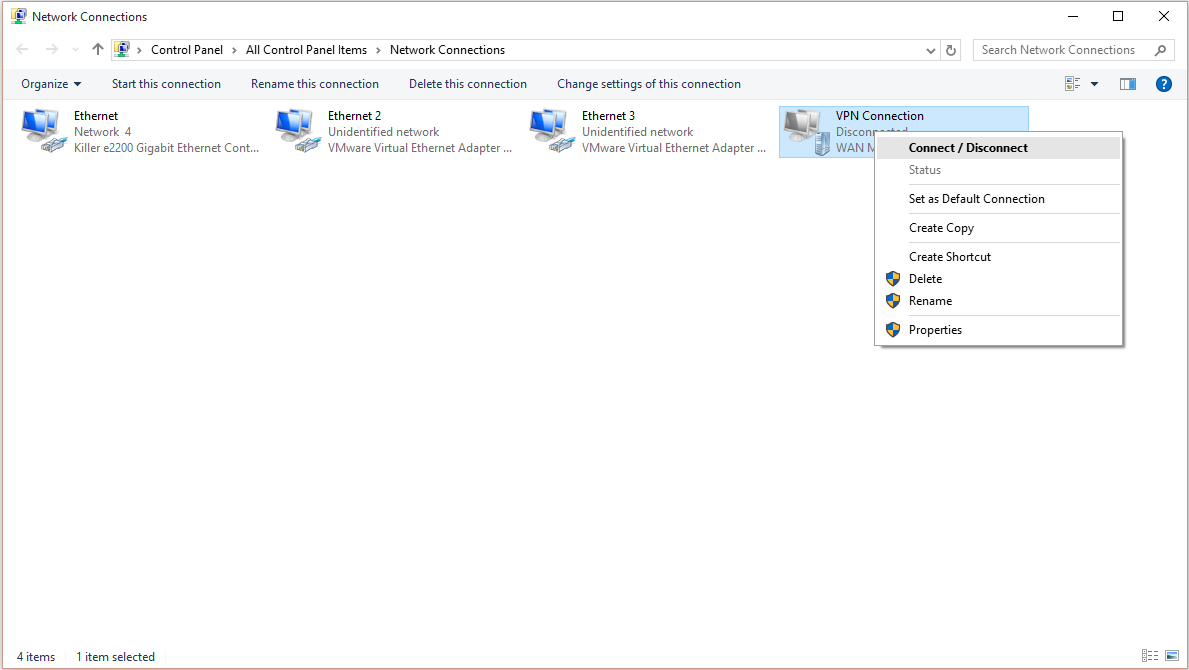
Find your VPN profile and click Connect.
Enter your username and password.
Click OK.